Computer Forum
 NZXT H6 RGB Test Review (Image © PCMasters.de)
NZXT H6 RGB+ in detail
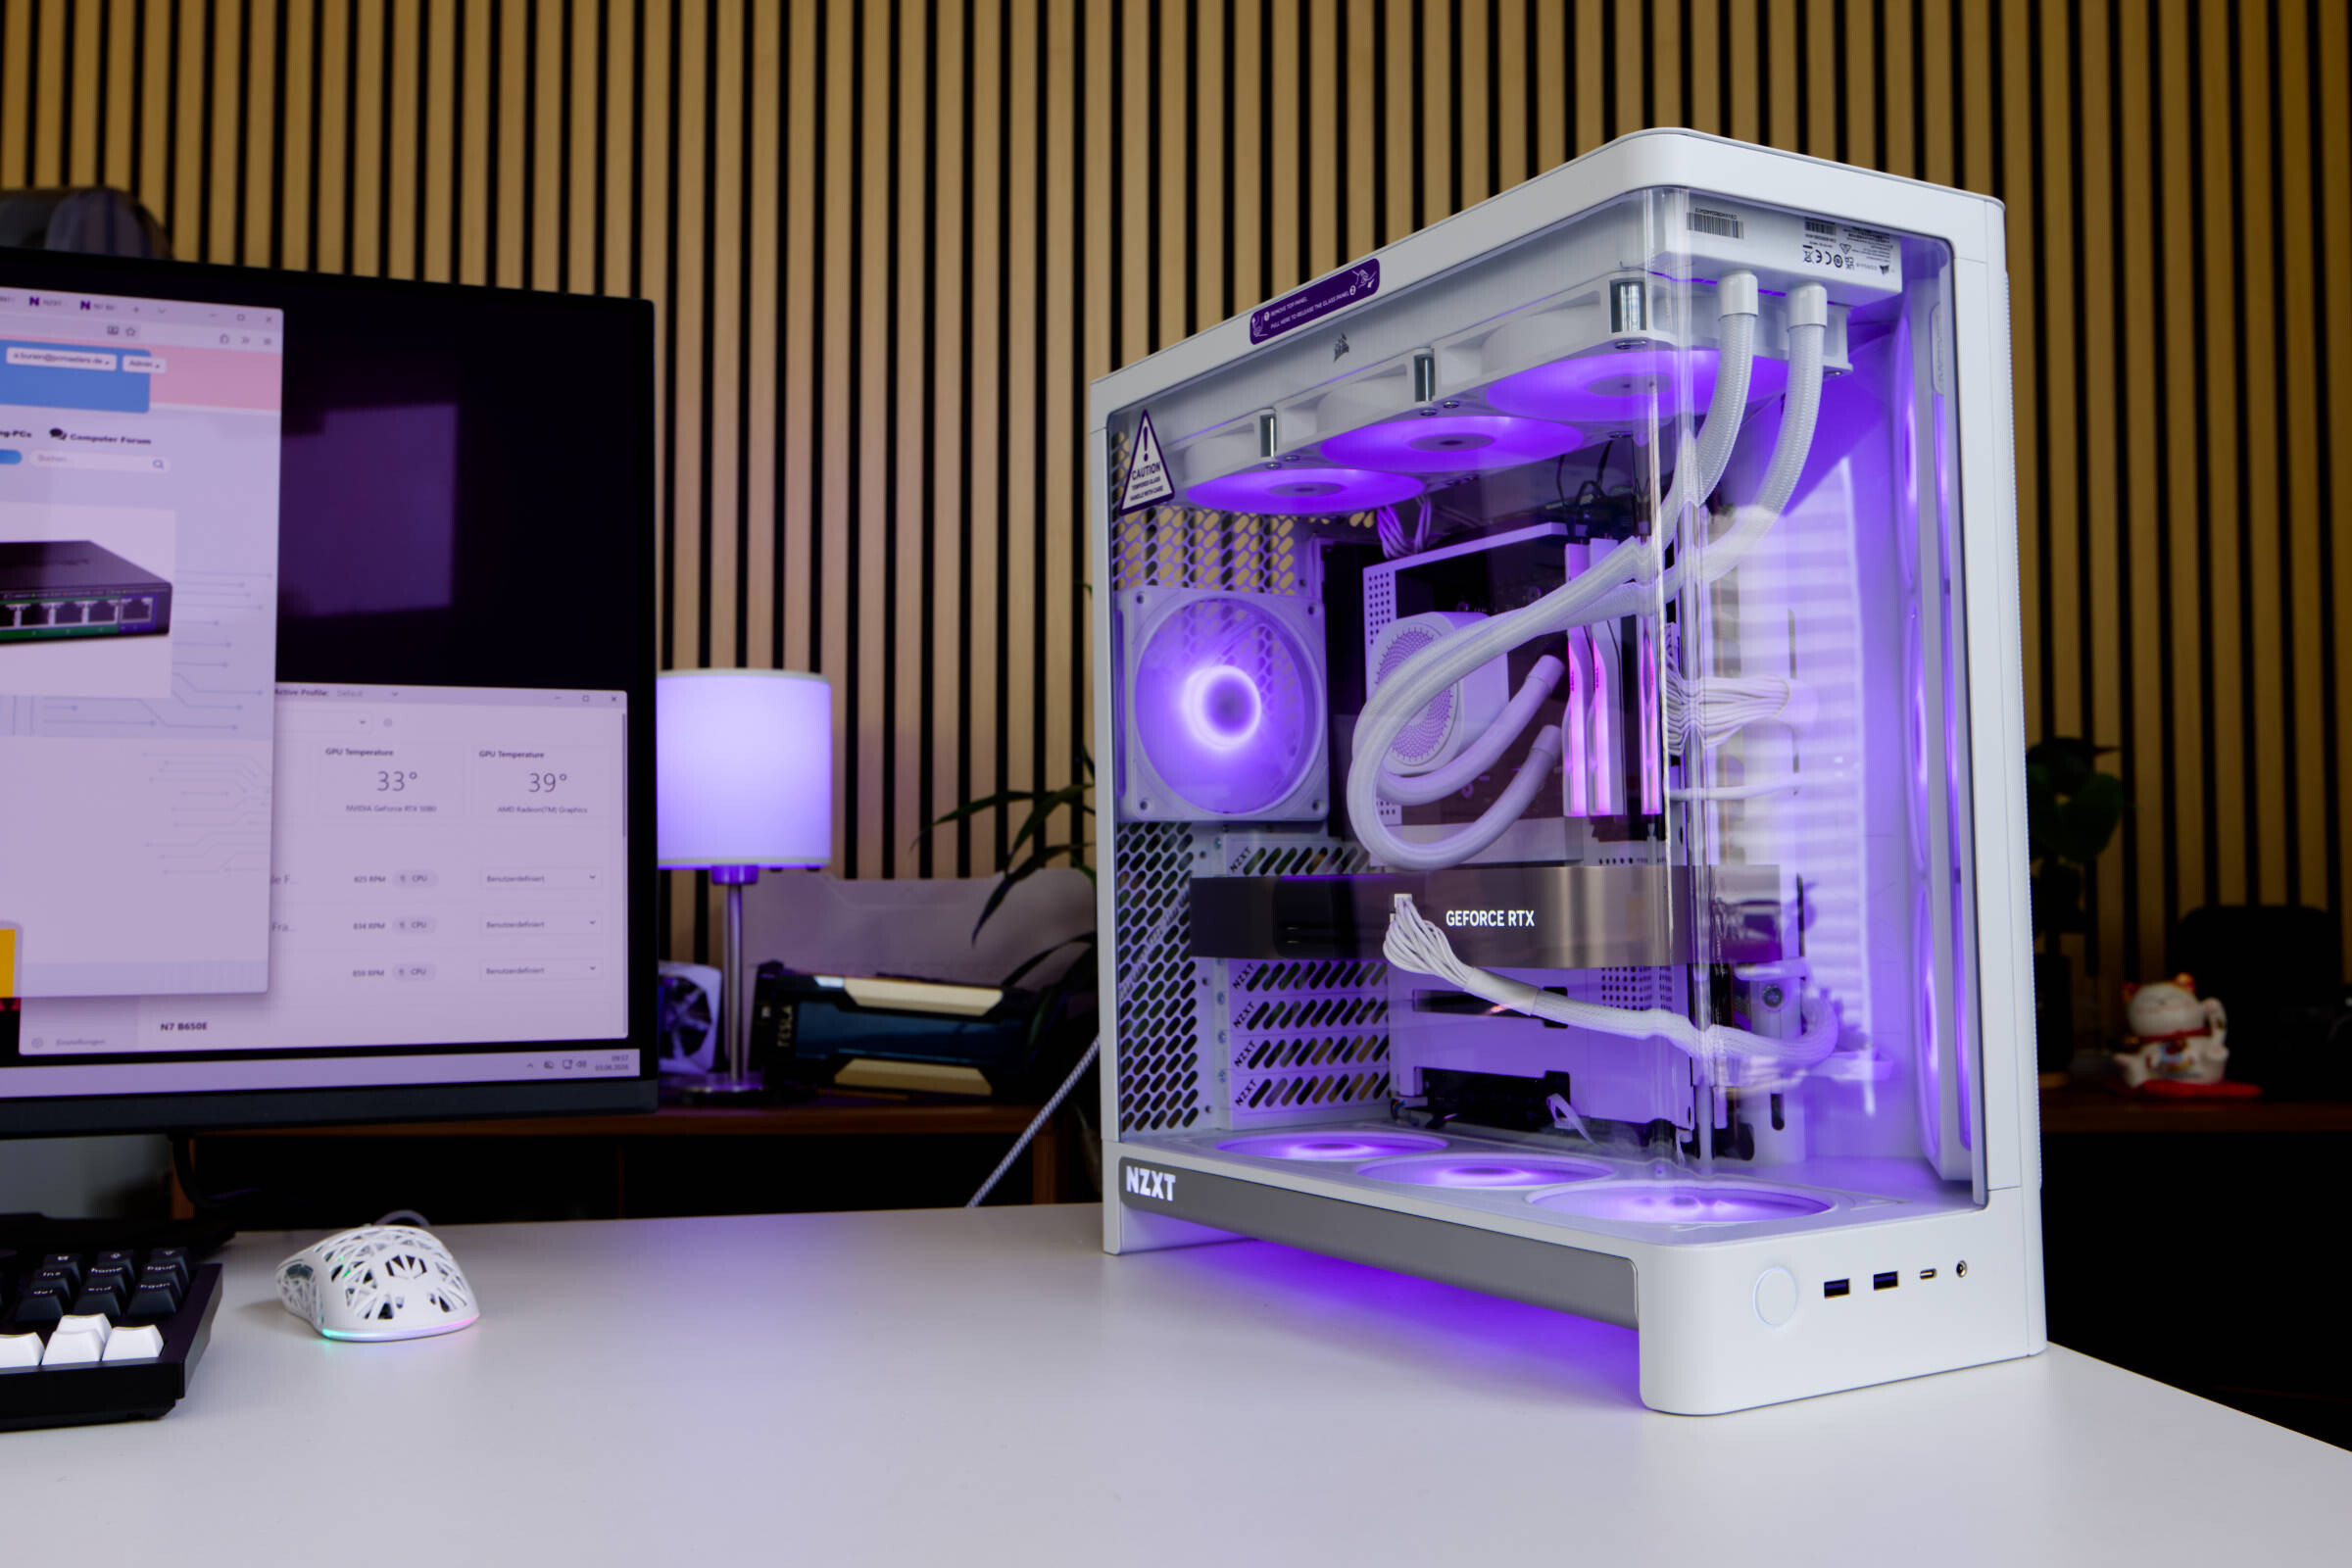
NZXT has introduced a range of new products to coincide with Computex 2026, including the new H6 RGB+ PC case in midi tower format, which we take a closer look at. The H6 series has been around for some time and the H6 RGB+ is a new addition with some interesting features and pre-installed fans. With a width of 292 mm, the case has slightly different proportions to what we are used to. Thanks to the dual-chamber design, in which the power supply unit is stowed at the rear of the case, it offers plenty of space in this second, rear chamber and supports CPU coolers with a height of just under 165 mm in the main chamber. Thanks to the division, cables can all reach the components comfortably and cleanly and the cabling of the single-frame fans, for example, cannot be seen through the main chamber. The distances from the power supply unit to the mainboard and graphics card are therefore very short. A 360 mm radiator can also be positioned at the top. Wider radiators have the holes at the top, but will probably have space problems.
 NZXT H6 RGB ausgepackt (Image © PCMasters.de)
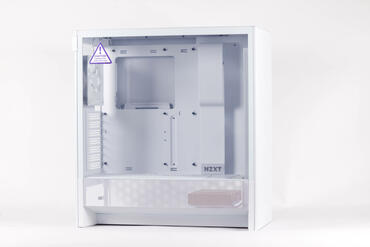
What strikes you immediately after unpacking is the huge glass panel, which is curved here and thus omits a strut at the corner. The glass panel is also almost full height. The glass is protected on the outside by steel covers, but not at the bottom. The glass is superbly finished and makes a very good impression.
 NZXT H6 RGB Staubschutz (Image © PCMasters.de)
NZXT has flattened the right-hand corner of some of its series to form a triangle in which the fans are positioned. This is not for the aesthetics of the case, but has a technical reason, as the fans push the air towards the components and not in a straight line against the glass side panel.
![]() NZXT H6 RGB NZXT Logo im Mesh (Image © PCMasters.de)
NZXT H6 RGB NZXT Logo im Mesh (Image © PCMasters.de)
A new feature is the corrugated shape of the side panel, which now consists of a large piece of metal that serves as an integral mesh panel. The stamped NZXT logo can also be seen on the corner, which gives the side panel an eye-catching look without being too conspicuous. You can't see the logo so prominently from every angle.
NZXT H6 RGB Staubschutz (Image © PCMasters.de)
The mesh side panel is inserted on the left-hand side and then secured on all other sides by a hook-in mechanism. The glass panel is also only hooked in, but can also be screwed on from above if necessary.
 NZXT H6 RGB Rückseite (Image © PCMasters.de)
The back reveals the division of the dual-chamber design. Basically, one third of the width is used for the second chamber on the side. Hard disks can also be attached to the wall in a tray here. The rear is perforated throughout on the sides of the main chamber so that air can be routed to the outside.
 NZXT H6 RGB Slotgblenden (Image © PCMasters.de)
The seven slot bezels have wide punched-out lines and the NZXT lettering is also punched out at the edge.
 NZXT H6 RGB Mesh Seite (Image © PCMasters.de)
If you look straight at the mesh, you can see into the second chamber. Black cables could possibly be seen through here. There is an opening at the bottom on both sides, which creates a large gap to the floor. There is a gray plastic layer on both sides that can be used to lift the housing.
![]() NZXT H6 RGB NZXT Logo unten (Image © PCMasters.de)
NZXT H6 RGB NZXT Logo unten (Image © PCMasters.de)
The NZXT logo, which lights up when the PC is switched on, is also cut out of the gray layer on the left-hand side of the case.
 NZXT H6 RGB GPU Halterung (Image © PCMasters.de)
NZXT has also installed a GPU bracket on the inside, which can be loosened and then moved using a screw. This curved piece of metal is fitted with a rubber pad at the end, which ensures that the graphics card is not scratched and also blocks vibrations.
 NZXT H6 RGB Top Panel (Image © PCMasters.de)
The top panel also has a large mesh surface. The panel is attached without screws and can be pulled off at the top.
 NZXT H6 RGB Glas Panel (Image © PCMasters.de)
The mainboard tray is prepared for Back-Connect and also offers a large recess for coolers in the backplate area. The glass panel is clear and not tinted.
 NZXT H6 RGB Glaspanel Stärke (Image © PCMasters.de)
The glass panel is fixed at the top and sides with steel to protect it from damage. Small pads are also glued to one side to dampen vibrations. The panel does not bend and makes a very solid impression.
 NZXT H6 RGB gebogenes Glas (Image © PCMasters.de)
 NZXT H6 RGB Top (Image © PCMasters.de)
Build quality
From the angled front to the bottom, the mesh is very well finished and neatly painted. The same applies to the top panel. The metal side panel is stiff enough and the hooking mechanism is strong. The tempered glass is clear (without tinting) and very well made. The plastic element at the bottom looks like aluminium and is only recognized as plastic on closer inspection. You can easily grip the sides of the PC to lift it. The case does not bend and has a well-balanced thickness. The pre-installed fans are all already installed and provide additional stability.
We could not find any defects.
 NZXT H6 RGB NZXT Lüfter unten (Image © PCMasters.de)
Good airflow concept with single-frame fans
NZXT has supplied the H6 RGB+ with very good equipment ex works. The manufacturer relies on its own F360 RGB reverse single-frame fans and installs two of them. The first is positioned on the side of the front and the second is located at the bottom. Both fans are reverse blade fans that have the rotor blades inverted. NZXT dispenses with stickers and ensures a very clean look.
 NZXT H6 RGB Reverse Blades (Image © PCMasters.de)
According to the specification, the fans can reach 2,200 ± 220 rpm and we were almost able to achieve this. With the stated 34.39 dBA, it is not clear at what distance and speed this value was measured, but they are far too loud above 1,400 rpm. The air flow rate is specified as 62.14 CFM per fan at 2.7 mmH₂O. The fans and the ARGB lighting are powered via the proprietary 8-pin cable, which simply combines the signals in one connector.
 NZXT H6 RGB Single Frame Lüfter (Image © PCMasters.de)
At the bottom, the fans are deeply recessed and a flat surface is formed, so that the fans do not stand out and everything looks cleaner and more uniform.
 NZXT H6 RGB Lüfter Seitenteil (Image © PCMasters.de)
 NZXT H6 RGB Lüfter Close up (Image © PCMasters.de)
The side fan frame is fixed in place with four screws. So you can easily remove them if you want to. The fans have a transparent layer in the middle of the frame, which also lights up. However, this is best seen on the rear fan.
 NZXT H6 RGB Rücklüfter (Image © PCMasters.de)
NZXT uses the tried and tested F120 RGB as the rear fan. It operates at an even higher speed of 2,400 ± 240 rpm. You have to set it below 1,000 rpm, otherwise it will be too loud. According to NZXT, it delivers 70.67 CFM at a static pressure of 3.7 mmH₂O, which is probably achieved at full speed. The fan is connected to the control hub via a 4-pin PWM connector and can therefore be controlled in a high speed range.
 NZXT H6 RGB Lüfterframe (Image © PCMasters.de)
The large mesh on the front is corrugated and also looks stylish when the lighting is activated.
 NZXT H6 RGB Seitenlüfter mit Mesh (Image © PCMasters.de)
Sound level measurement
We measured the sound level of the fans individually in the closed housing at a distance of 20 cm. The single-frame fans then had to be evaluated as a whole. The following diagram shows the measurements visually and the individual measurements are listed below.
Measurement data and volume of the front single-frame fan
Measured with closed glass panel and side panels.
- 100% PWM signal**: 2,189 rpm, 52.3 db(A), very loud
- 90 % PWM signal: 2,013 rpm, 50.2 db(A), very loud
- 80 % PWM signal**: 1,834 rpm, 47.0 db(A), loud
- 70 % PWM signal**: 1,652 rpm, 44.6 db(A), loud
- 60 % PWM signal**: 1,477 rpm, 42.5 db(A), loud
- 50 % PWM signal**: 1,301 rpm, 40.4 db(A), perceptible
- 40 % PWM signal**: 1,121 rpm, 38.6 db(A), perceptible
- 30 % PWM signal: 946 rpm, 35.0 db(A), slightly perceptible, room volume (office)
- 20 % PWM signal: 752 rpm, 34.2 db(A), quiet, room volume (office)
- 10 % PWM signal: 610 rpm, 33.6 db(A), quiet, room volume (office)
Measurement data and volume of the lower single-frame fan
Measured with closed glass panel and side panels.
- 100 % PWM signal: 2,189 rpm, 52.3 db(A), very loud
- 90 % PWM signal: 2,027 rpm, 49.1 db(A), very loud
- 80 % PWM signal**: 1,851 rpm, 46.8 db(A), loud
- 70 % PWM signal**: 1,666 rpm, 43.7 db(A), loud
- 60 % PWM signal**: 1,488 rpm, 40.3 db(A), loud
- 50 % PWM signal**: 1,312 rpm, 37.7 db(A), perceptible
- 40 % PWM signal**: 1,149 rpm, 35.3 db(A), perceptible
- 30 % PWM signal: 953 rpm, 33.9 db(A), slightly perceptible, room volume (office)
- 20 % PWM signal: 770 rpm, 33.7 db(A), quiet, room volume (office)
- 10 % PWM signal: 597 rpm, 33.0 db(A), quiet, room volume (office)
Measurement data and volume of the rear 120 mm fan
Measured with closed glass panel and side panels.
- 100 % PWM signal: 2,390 rpm, 49.4 db(A), very loud
- 90 % PWM signal: 2,189 rpm, 47.2 db(A), very loud
- 80 % PWM signal**: 1,993 rpm, 44.9 db(A), loud
- 70 % PWM signal**: 1,801 rpm, 41.6 db(A), loud
- 60 % PWM signal**: 1,604 rpm, 38.5 db(A), loud
- 50 % PWM signal**: 1,395 rpm, 36.4 db(A), perceptible
- 40 % PWM signal**: 1,178 rpm, 34.4 db(A), perceptible
- 30 % PWM signal: 998 rpm, 33.6 db(A), slightly perceptible, room volume (office)
- 20 % PWM signal: 804 rpm, 33.6 db(A), quiet, room volume (office)
- 10 % PWM signal: 602 rpm, 32.6 db(A), quiet, room volume (office)
 NZXT H6 RGB Controller (Image © PCMasters.de)
Control Hub Lite
The package also includes a control hub where the fans and lighting come together. All cables are laid and connected ex works. For operation, the SATA power cable must be connected to the power supply unit and the USB 2 header to the mainboard.
 NZXT CAM Lüfterdrehzahl (Image © PCMasters.de)
 NZXT CAM Lüfterdrehzahl 2 (Image © PCMasters.de)
The CAM software can then be used to control and adjust the lighting. The software offers many options for speed adjustment and users can freely define fixed values or curves separately for each connection. This means that the speed of the front and bottom fans can be set separately or adjusted to each other. The same applies to the rear fan. The hub is black and is the only component that stands out in the white housing.
 NZXT CAM RGB (Image © PCMasters.de)
The controller is equipped with the pre-installed fans and no other fans can be connected to it.
 NZXT H6 RGB IO Panel (Image © PCMasters.de)
IO Panel
The buttons and connections are positioned at the bottom and are very cleanly integrated. The large round power button is illuminated in white and is slightly rounded. Next to it are two USB 3.2 Gen1 Type-A ports and one USB 3.2 Gen2x2 Type-C port. The equipment is not lavish but still modern. There is also a headset jack for headphones.
 NZXT H6 RGB Verpackung (Image © PCMasters.de)
Packaging & scope of delivery
We can definitely praise NZXT for the packaging, because the outer box is solid and minimalistically printed, but inside we find a thick protective layer that provides good protection.
 NZXT H6 RGB Verpackung Rückseite (Image © PCMasters.de)
 NZXT H6 RGB Schutzschicht (Image © PCMasters.de)
All the accessories are contained in a small cardboard box attached to the HDD cage. It contains all the necessary screws, spacers for mainboards and cable ties as well as a manual.
 NZXT H6 RGB Lieferumfang (Image © PCMasters.de)
The scope of delivery includes a plastic box containing many screws in small bags. Unfortunately, there are several times too many screws packed in plastic - this could be improved! The manual supplied is detailed and well structured. We also get some cable ties and dividers for the box so that the screws or accessories can be sorted separately.
 NZXT H6 RGB ARGB Green (Image © PCMasters.de)
Technical data
| NZXT H6 RGB+ technical data (manufacturer's specifications) | |
|---|---|
| Case type | Midi tower |
| Material | Steel, glass |
| Color (inside / outside) | White / Black |
| Dimensions | 292 x 448 x 420 mm |
| Mainboard sizes | ATX, Mini-ITX, M-ATX |
| Weight | 9.3 kg |
| Max. CPU cooler height | 165 mm |
| Max. Graphics card length | 390 mm |
| 3.5" mounting slots | 1 |
| 2.5" mounting slots | 2 |
| Fans, pre-installed | 2 x F360 RGB Reverse, 1 x F120 RGB |
| Fans, optional | top: 3 × 120 mm |
| PCIe slots | 7 |
| I/O panel | 1x USB-C 3.2 via USB header Key-A (20Gb/s), 2x USB-A 3.0 (5Gb/s), 1x 3.5mm jack line-in/out |
| Special feature | Cable management, compatible with motherboards with rear motherboard connectors (ASUS BTF, Gigabyte Project Stealth, MSI Project Zero), graphics card holder, glass viewing window, multi-chamber design |
| Warranty | 2 years |
| Price | 199 € (Affiliate) |
Test setup
We use the following components as the test system. The setup is as follows: - CPU: AMD Ryzen 7 9700X - CPU cooler: Corsair Nautilus 360 RS ARGB - **Mainboard: NZXT N7 B650E White - RAM: G.Skill Trident Z5 Royal RGB Silver - SSD: 2 x NVMe SSDs - Graphics card: NVIDIA GeForce RTX 5080 FE - Power supply**: NZXT C1200 Gold
System installation
The practical part of the case test includes the installation of PC components. We usually proceed in the same way. First, all the side panels are removed and then the accessories are laid out. As we will not be attaching the radiator to the front, the front panel does not need to be removed.
 NZXT H6 RGB Schrauben (Image © PCMasters.de)
The plastic box that is clamped in the HDD cage is really useful. This is removed from the cage before installing the components. You also have to remove all the side panels so that you can install everything.
The packaging of the screws is a bit annoying, as you can't separate the bags from each other, you simply tear off too much in a controlled manner.
 NZXT H6 RGB Netzteileinbau (Image © PCMasters.de)
Power supply unit
We use a white NZXT C1200 Gold power supply for the build, which matches the case perfectly thanks to its silver and white look. It often makes sense to install the power supply first so that you can lay all the necessary cables directly. As it is a modular power supply unit, only the necessary cables need to be connected to the power supply unit. This means that unnecessary cables do not get in the way and everything can be laid more neatly.
 NZXT H6 RGB Kabelführung Rückseite (Image © PCMasters.de)
The power supply unit is fixed to the housing with four screws - just like all other manufacturers.
 NZXT H6 RGB Netzteileinbau 2 (Image © PCMasters.de)
The 1,200 watts of output power are more than sufficient for all builds, even if you want to install a GeForce RTX 5090 in it. For most systems, however, 800 to 1,000 W will suffice these days.
 NZXT H6 RGB Mainboardeinbau (Image © PCMasters.de)
Mainboard installation
An AIO is installed in the system, which is why you can already attach the CPU and possibly the standoffs of the AIO to the board. The DDR5 memory can also be installed later, as we need space to connect the cables.
 NZXT H6 RGB Kabelführung (Image © PCMasters.de)
The case accepts a maximum of ATX boards, but supports Back-Connect. If you prefer a small board, you can also install Micro-ATX or Mini-ITX boards.
We use the NZXT B650E motherboard, which fits the build well and looks stylish in a black and white look. Since the AM5 socket is used here, we have selected the Ryzen 7 9700X (test) CPU as a supplement.
360 AIO water cooling
Since the top of the case is designed for radiators with a maximum size of 360, we opted for a Corsair Nautilus 360 RS ARGB AIO CPU water cooler from a previous test. The AIO is white and otherwise fits in well with the build. There are some cut-outs for the radiator at the top of the case and you have some room to move the radiator a little.
 NZXT H6 RGB Radiator Top (Image © PCMasters.de)
Once the radiator is fixed at the top, the water block can be mounted on the CPU. There is plenty of space in the housing, which makes installation really easy. We have connected the fans to the motherboard and the ARGB lighting to the controller on the protruding ARGB cable.
NZXT H6 RGB Kabelführung Rückseite (Image © PCMasters.de)
Cable management
There are some openings on the sides for the thick cables from the power supply, which are slightly angled and therefore appear somewhat concealed. There are also basically two openings at the bottom, one of which is angled like a channel. The positioning is good and makes cabling easy. Thanks to the many Velcro fasteners, the cable harnesses can all be attached directly and detached if necessary. This also makes cabling easier.
 NZXT H6 RGB Klettverschluss (Image © PCMasters.de)
The many cables to the controller and I/O panel are all already in the right place and can be easily routed to the ports. All cables, except for those of the controller, are white and also have white connectors.
If you have a black power supply unit, you can use sleeved power supply cables to enhance the look. You can also connect the cables you need and leave the others in the box. You can also make the cabling cleaner - there's always room for improvement.
 NZXT H6 RGB HDD Cage (Image © PCMasters.de)
SSD assembly
Two 2.5" SSDs or a 3.5" hard disk can be installed in the removable HDD cage. In our system, we only use NVMe SSDs that are mounted on the mainboard. These are then not visible, as they are installed behind a cooler in the M.2 slot.
The cage can be reattached and screwed down after the SSDs have been installed. There is sufficient space on the back here.
 NZXT H6 RGB RTX 5080 FE mit Halterung (Image © PCMasters.de)
Graphics card installation
The graphics card can only be installed horizontally in the case, as is usually the case. We use the first PCIe x16 slot on the mainboard and occupy two slots with the selected graphics card. The expansion cards are fixed in place with screws.
We fed the 12V 2x6 PCIe cable through the side. You could pull it through from below, but then it would be even more visible. Once the GeForce RTX 5080 FE has been installed and supplied with power, the graphics card holder can be released and pushed upwards. It collides with the USB header, which is why this had to be removed. The bracket can then be tightened at the top and additionally supports the graphics card in the rear area.
 NZXT H6 RGB Fazit (Image © PCMasters.de)
Conclusion on the NZXT H6 RGB+
NZXT has made a good hit with the H6 RGB+. The case is now also available as a version without a fan, which saves the user €90, as the H6 Basic version costs €109 (Affiliate). The H6 RGB+ version we tested costs €199 at the start (Affiliate). Considering the overall package, which includes two single-frame reverse blade fans in 360 format and a 120 mm fan in the rear as well as a matching controller, we believe the price is justified.
The installation of components is easy and fun. We had no problems during installation and the pre-routed cables for the fans also saved us time. The 360 radiator fits easily into the top and brings the system up to the maximum number of fans. However, the fans of the AIO water cooling system cannot be connected to the NZXT controller, as it is fully equipped with the fans that NZXT has installed. The fans have a very wide speed range, but are a little too loud for us above 1,300 rpm.
In any case, the fact that there is so much mesh in the front and sides as well as the top panel is positive. The wavy mesh and the stamped NZXT logo on the side look stylish, but the curved tempered glass panel, which allows a panoramic view, is also very stylish. This means that the design and implementation as well as the build quality are at an even higher level than usual. The recessed fans in the lower area also make the case look cleaner. The cable management is well supported.
So if you are looking for a showcase that is well thought out, you will certainly have a lot of fun with the H6 RGB+.
Pro
- Good build quality
- Good airflow design with almost complete fan assembly
- Two large 360 single-frame fans at the front and in the base with ARGB lighting
- Control Hub Lite for pre-installed fans
- Compatible with Micro-ITX to ATX mainboards
- Clean design in white or black
- White cabling
- Dual-chamber design
- Supports large CPU coolers, graphics cards and power supplies
Cons
- I/O panel could be more extensive
- Fans are very loud at medium to full speed